Like many people, I had seen wild crazy looking mechanical keyboards, and had been both fascinated and confused by them. How could you get by with so few keys? What does each key actually do? They looked like some kind of wild alien input device, but, at the same time, must work well otherwise the fad would have died out years ago. The high cost and fear of failure, thought, was enough to put me off of trying them out.
While attending OSHCamp earlier this year, a talk by Alan Wood explained a lot of the ideas behind these keyboards, and answered a lot of my questions – except for one; Would I be able to cope adjusting to one?
There was a workshop the following day where all the parts were supplied to build a Reviung 34 keyboard, except for the keycaps, micro controller, and optional laser cut acrylic. This was the perfect low barrier to entry I needed to find out if these low key count options were right for me.
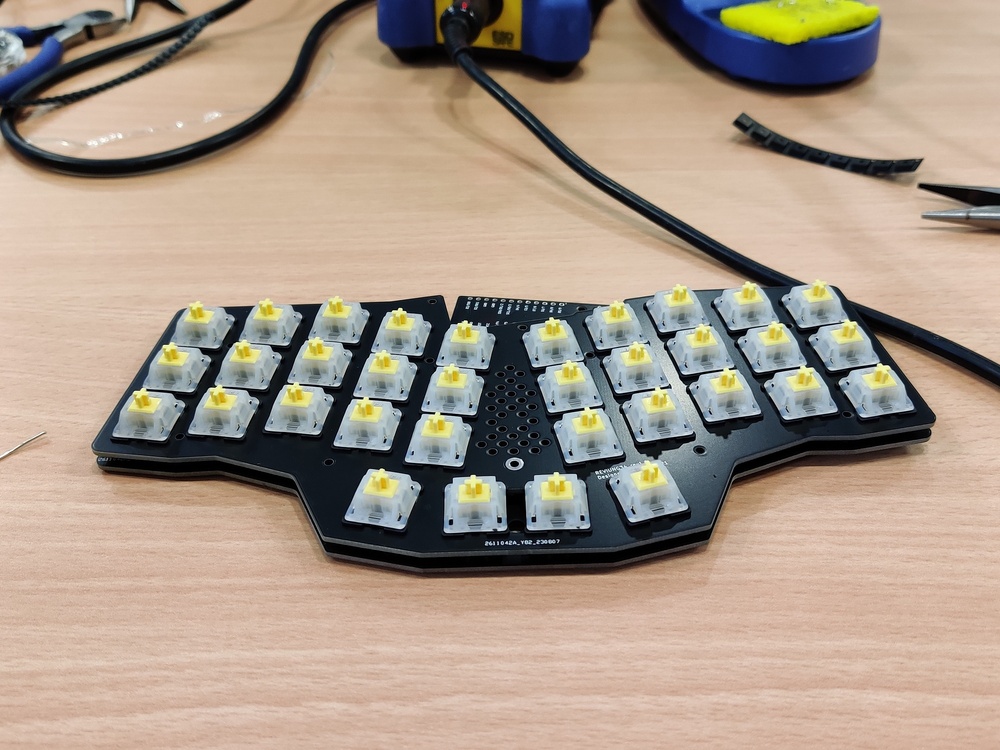
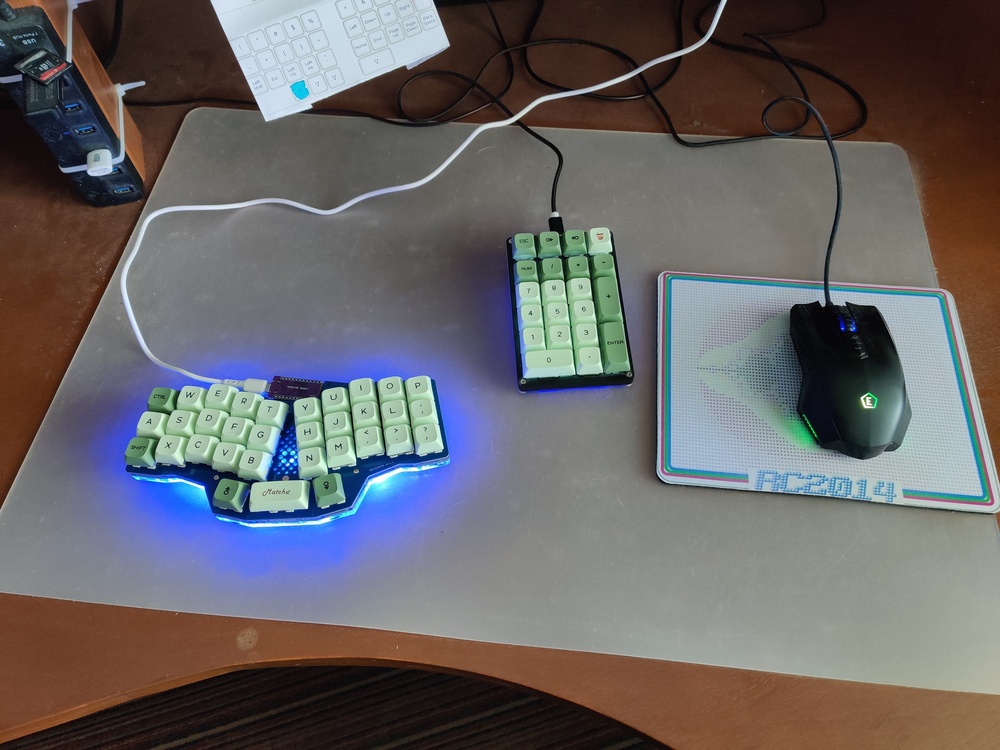
Reviung 34
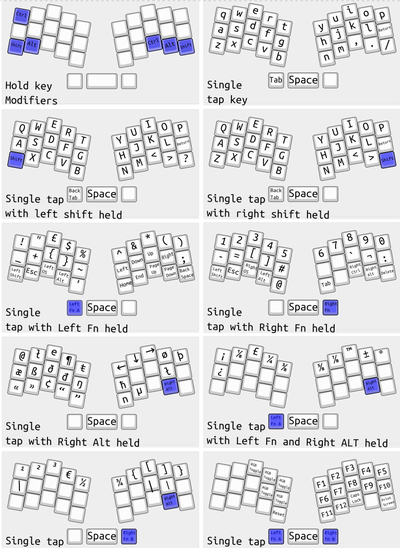
The Reiung 34 is an Open Source keyboard design by gtips. As the name implies, it uses 34 keys – although it can be built with 33 keys. It is split column staggered, that is to say that the keys are lined up in columns, centrally split. Nominally there are 26 letters (A – Z) keys, plus 3 punctuation, return, space, delete and 2 modifiers.
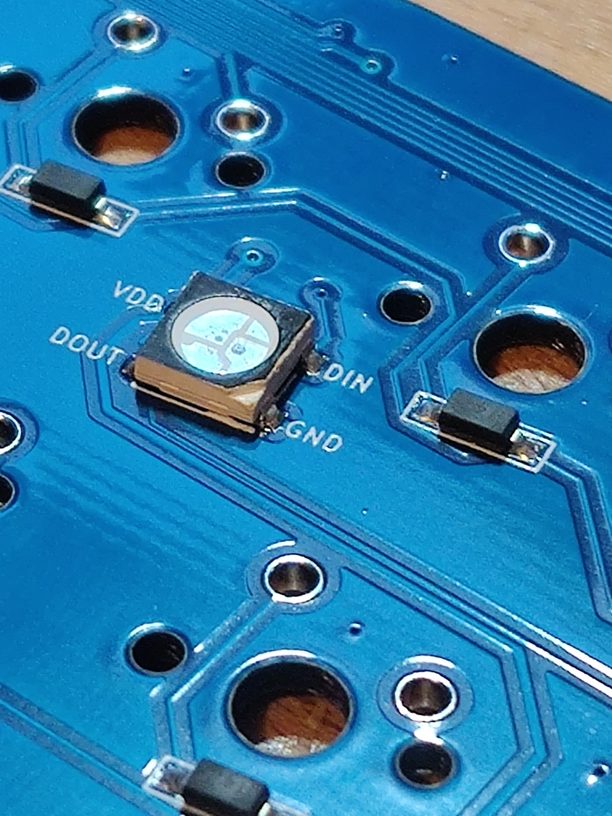
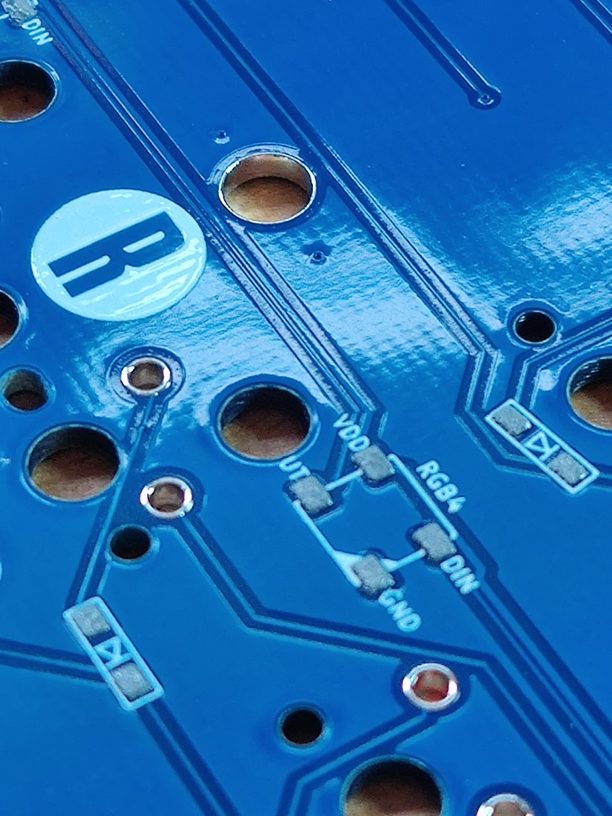
The keyboard is designed to run a standard Arduino Pro Micro that runs the QMK firmware, although there are lots of compatible micro controllers and firmware that can be used instead. The QMK firmware runs on hundreds of different keyboards and can be easily customised to for any layout you want. It handles modifiers through the use of layers, and can control things like RGB LED lighting and other controls too.
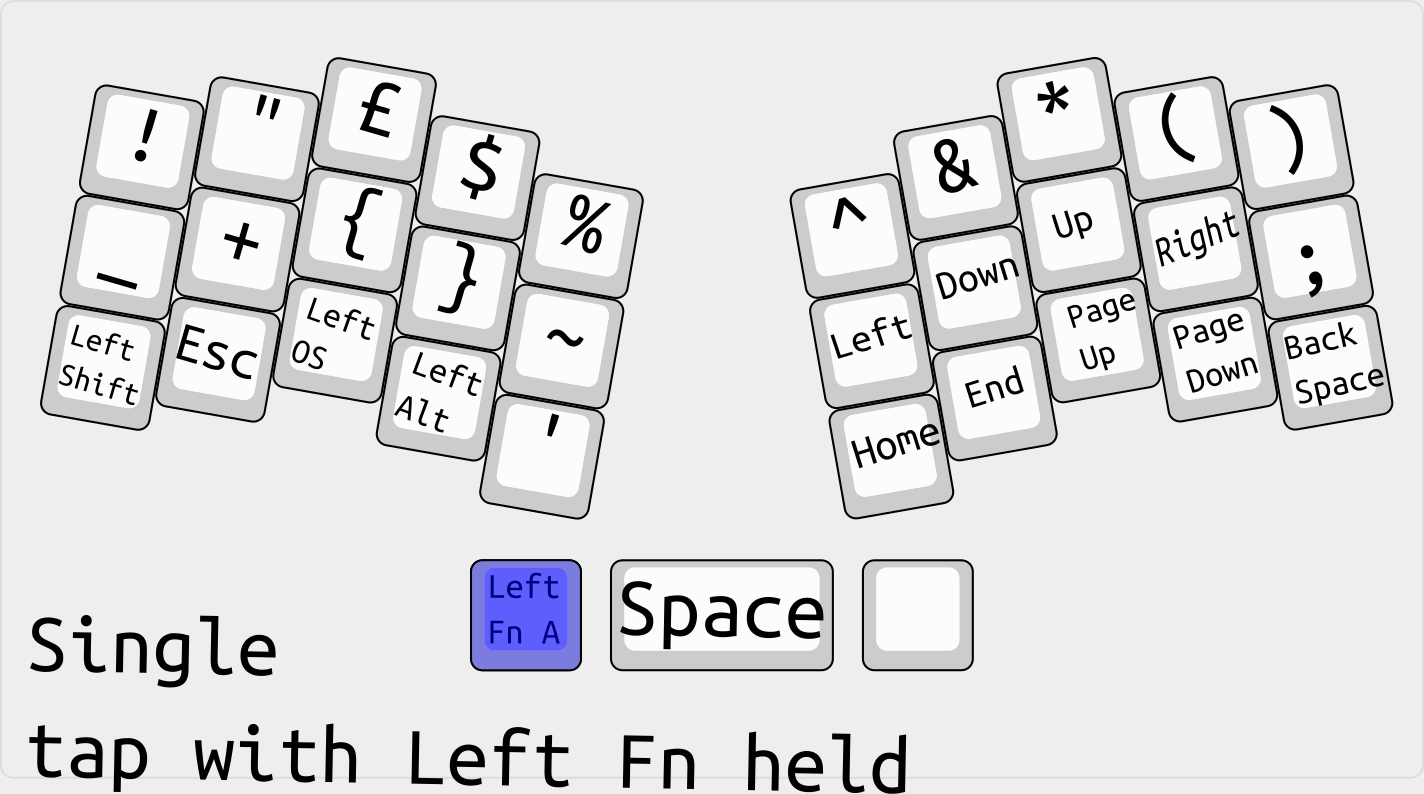
All of the keys (except space) have multiple uses, and some of the regular keys double up as modifiers too. For example, the “Z” key, bottom left corner, which is near to where shift would be on a normal keyboard, will give a z if tapped, but if held down and another key is pressed, will give the shifted output of that other key. So that means you can get any of your upper case keys – except for Z. Luckily, the “/” key on the opposite side also doubles up as a shift when held, so this can also get your upper case keys, including Z.

Other keys work in a similar way for control, alt and the OS (Windows / Mac) key.
The two modifiers either side of the space allow access to other keys such as the number row by holding down the right one, or the shifted number row by holding down the left one, as well as other combinations.
Why would you want to use a keyboard like this?
The biggest advantage of a reduced key keyboard is that your fingers never need to move far from the home keys (ASDF JKLreturn) to type what you want. This reduces fatigue due to less stretching. It also allows for much faster typing too.
A smaller keyboard also takes up much less desk space than a full size keyboard. And, if you travel around, carrying your favourite 102 key mechanical keyboard adds a lot of bulk and weight to your kit.
Of course, it isn’t the perfect solution for everybody. There is quite a steep learning curve, although if you’re already a reasonable touch typist, it isn’t as big as you’d expect. Some key strokes feel like a Dance Dance Revolution challenge for your fingers. Luckily, most of the characters you’re likely to type most often are quite intuitive. There are times too when that particular symbol seems like it keeps moving around the keyboard to avoid every being typed!
Although I could already type pretty well, I recommend doing at least the intermediate typing course on typing.com. Whilst typing.com is not aimed at custom keyboards like this, the lessons get you quickly acquainted with your keyboard with regular typing, and familiarity makes things much easier.
How did it work out for me?
Mistakes were made!
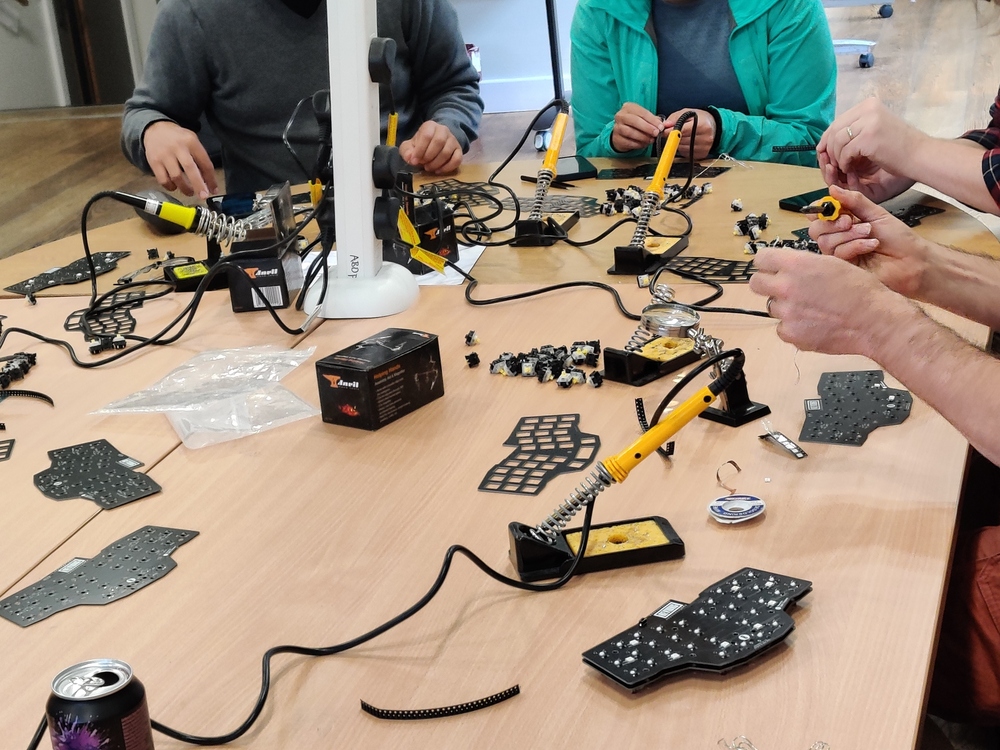
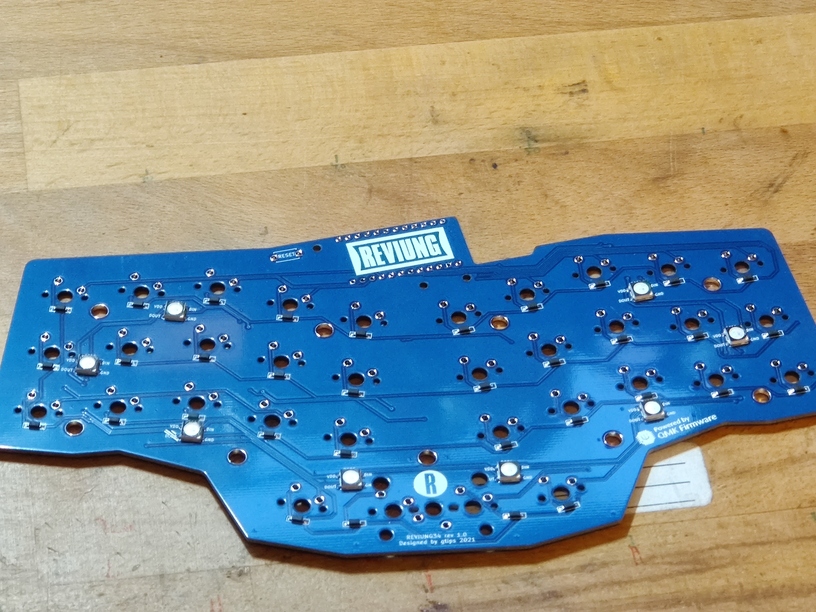
I was very excited to build my Reviung 34 at Alans workshop. However, it quickly became apparent that without my own soldering station that I’m used to, and the extra magnification that I am reluctantly realising that I need, that things weren’t going well with the assembly. There is a small surface mount diode for each key and 9 surface mount LED packages. Frankly, I disappointed myself with how well this came out on the day. On top of that, the top plate which holds the key switches may look like it is mirrored – but it is not. fitting this on upside-down means that the micro controller cannot be fitted.

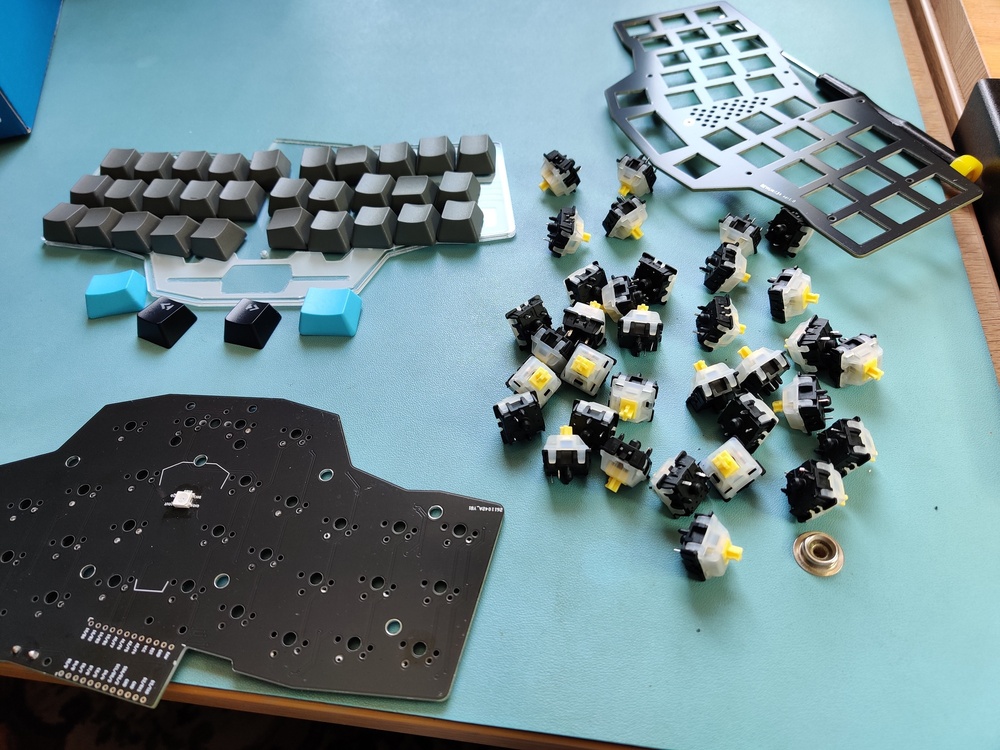
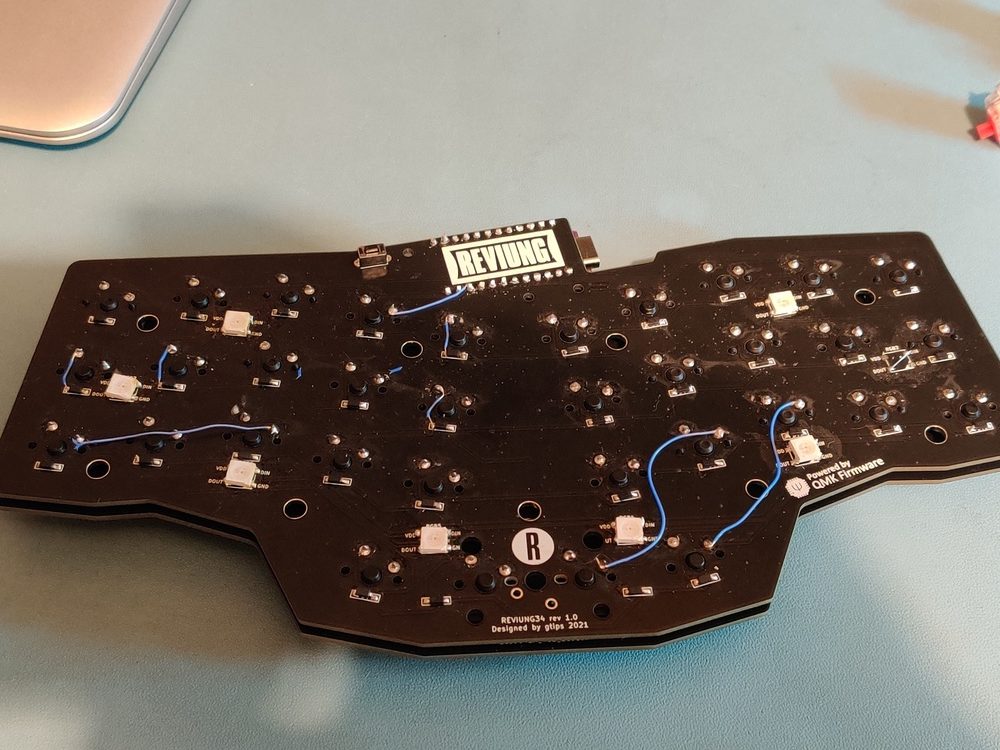
The only solution was to unsolder every single key switch to remove the top plate. This is an epic job in itself, but after getting them all out, I could flip the top plate over, re-fit the switches and connect the micro controller. This was where I discovered that there is a good way and a bad way to remove the switches – and I had used the bad way (gripping them vertically with pliers on the top), which damaged most of the switches! Luckily, I had some spare switches, but it still meant removing most switches again. And the replacement switches I had were MX Blue (clicky) vs Yellow (silent). Eventually, though, after fixing many errors and broken pads, I had a working keyboard.
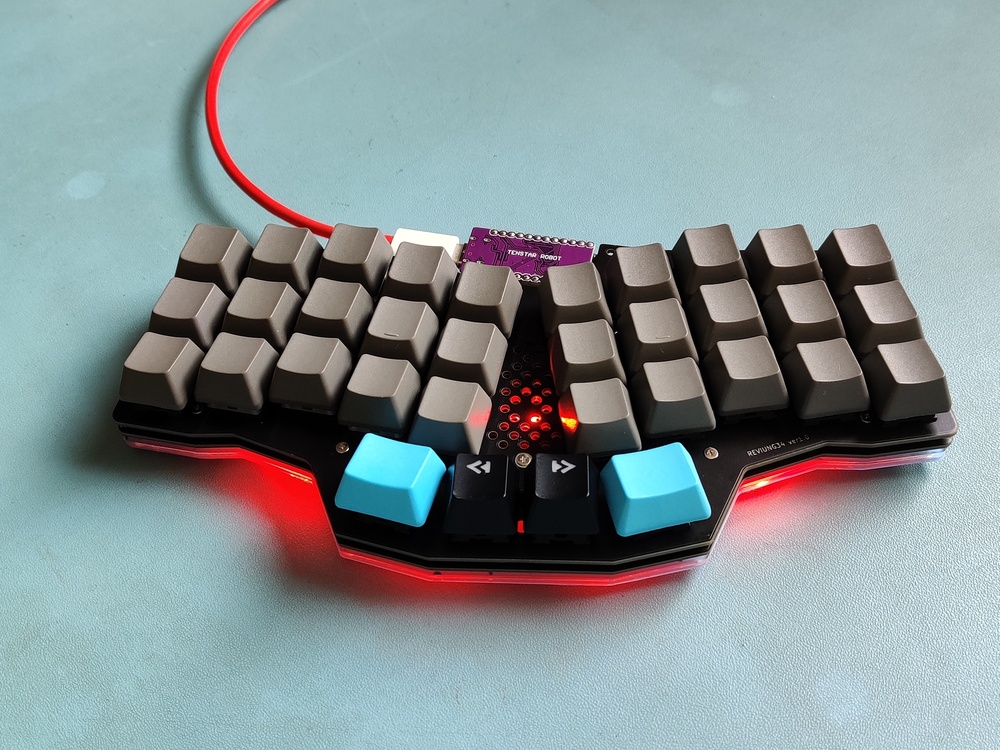
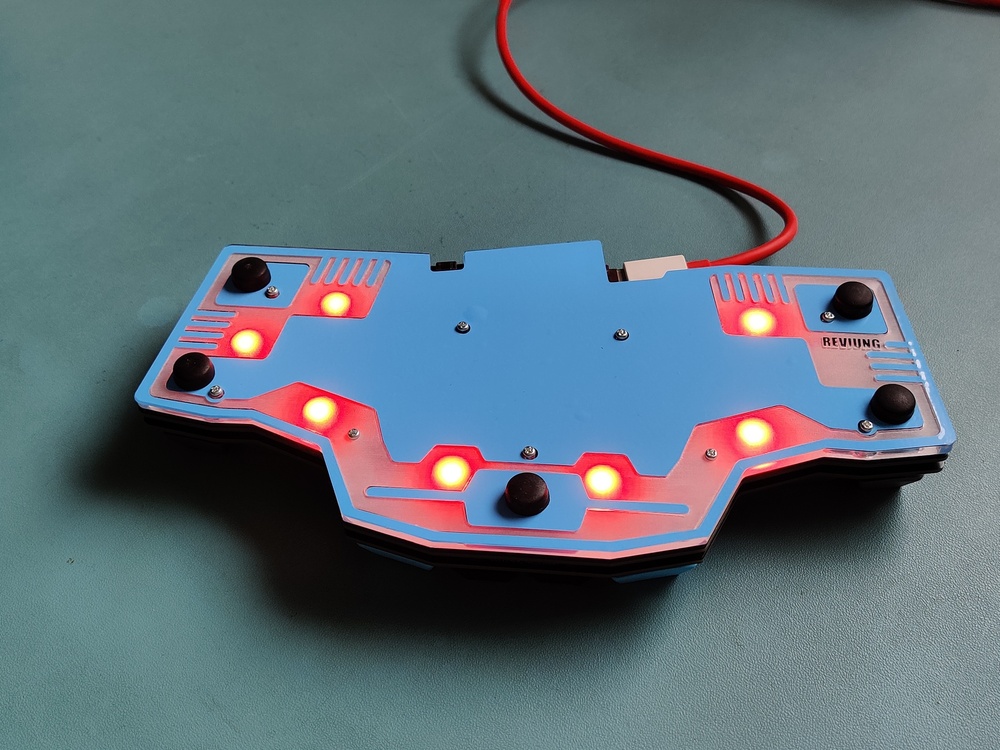
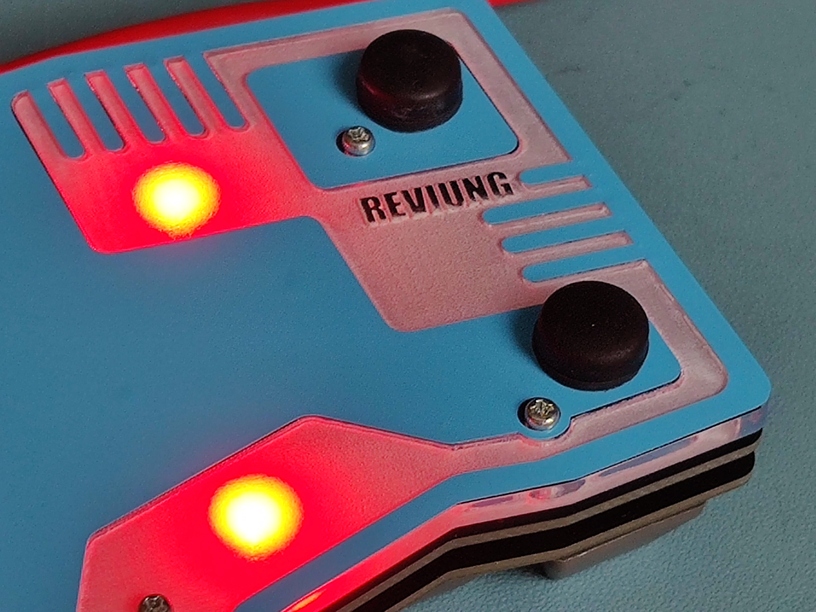
I laser cut the acrylic base plate, and chose to add a vinyl layer to hide the mess hidden below. Time to learn how to type!
Typing on it felt surprisingly good. Much more natural than I expected. Regular typing that doesn’t involve too much punctuation seemed to flow really easily. As mentioned earlier, the lessons on typing.com really helped. I initially had issues with mixing up the B and V keys, often trying to type B with the wrong hand. But, like to many things, practice really helps.
One of the first decisions that had to be made was to make this as a 33 or 34 key keyboard. The difference is the space bar can either be a central 2U wide key, or 2 individual keys where the left one is delete and the right is space. Having more keys sounds like a good idea, and a dedicated delete key must be good, right? Well, for me, I found the smaller space key annoying and I kept hitting the delete key with my left thumb when I wanted space. A minor issue, really, but if I had the chance again, I would choose a 33 key layout.
For over 6 weeks now, the Reviung has been my daily driver. Honest opinion is that it’s great. For anything number intensive it isn’t ideal, however, I do have a separate number pad that makes life much easier. For regular typing, I can easily hit over 60wpm on most typing tests. The common punctuation and symbols that I use, ‘ @ # ! :-) have all become second nature. A handy cheat-sheet isn’t too far away though in case I need ² or ½ or ±
One of the advantages of the QMK firmware is that it is totally customisable. I decided to go with the default layout to start with before making any changes, and ultimately decided that it does everything I want. Some of the layout was a little questionable at first, but clearly it has been developed by people that know a lot more about good keyboard layout than I do. So, I haven’t made any modifications, and probably won’t either.
Redemption and further down the rabbit hole
Spurred on by adapting to the Reviung better than expected, ashamed by the mistakes I had made at the start, and a desire to do things properly, I decided to try again. As mentioned earlier, the Reviung keyboards are open source, so the PCB design files are available and free to use. Whilst placing an order for some RC2014 circuit boards it was easy enough to add in an order for 5 (minimum order quantity) top and base plates.
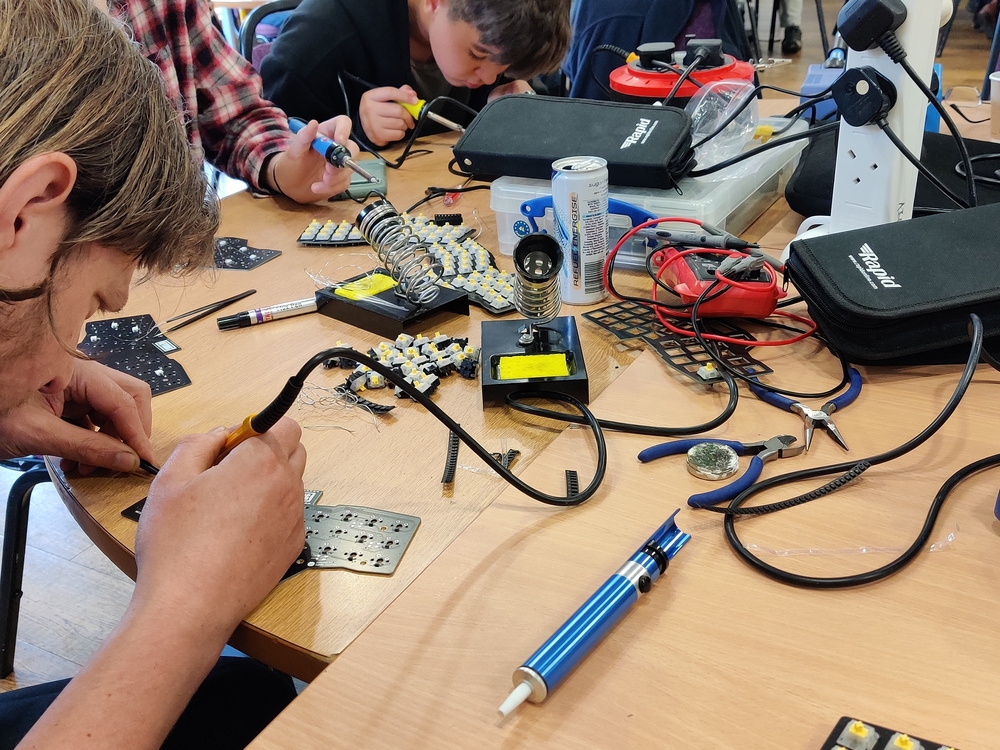
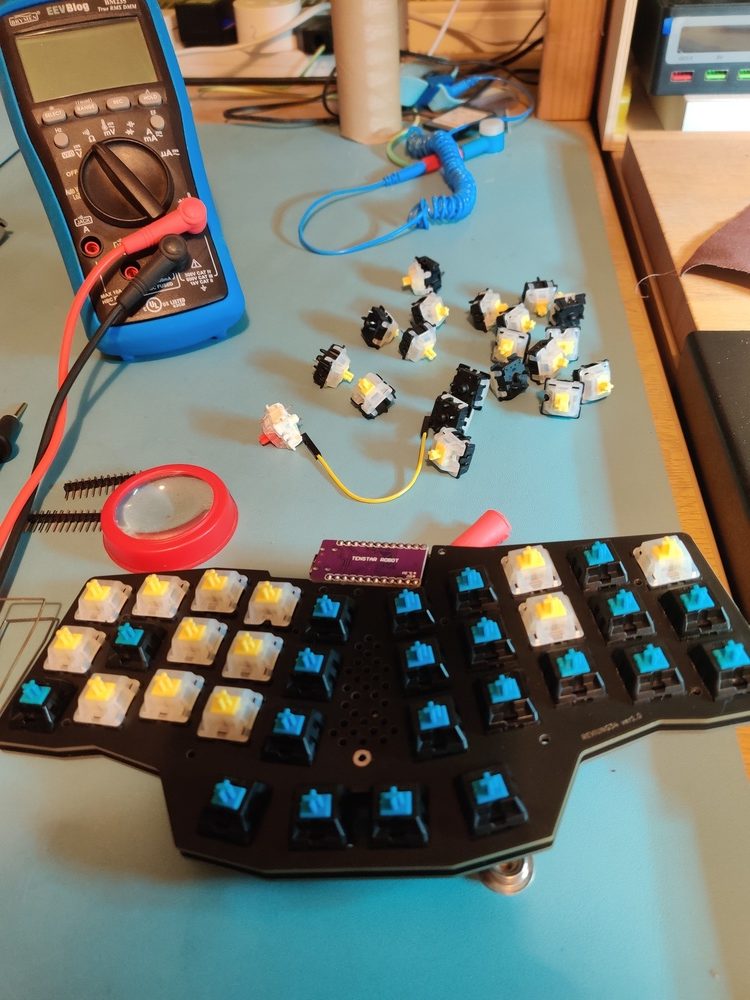
This time I did things properly. I laser cut a stencil so that I could use solder paste and hot air reflow for all the surface mount parts.
I have now built 3 of these since the original workshop one. One is my daily driver, and has clicky MX Blue switches and full 3 layers of acrylic. This is a really solid keyboard and perfect for desktop use.
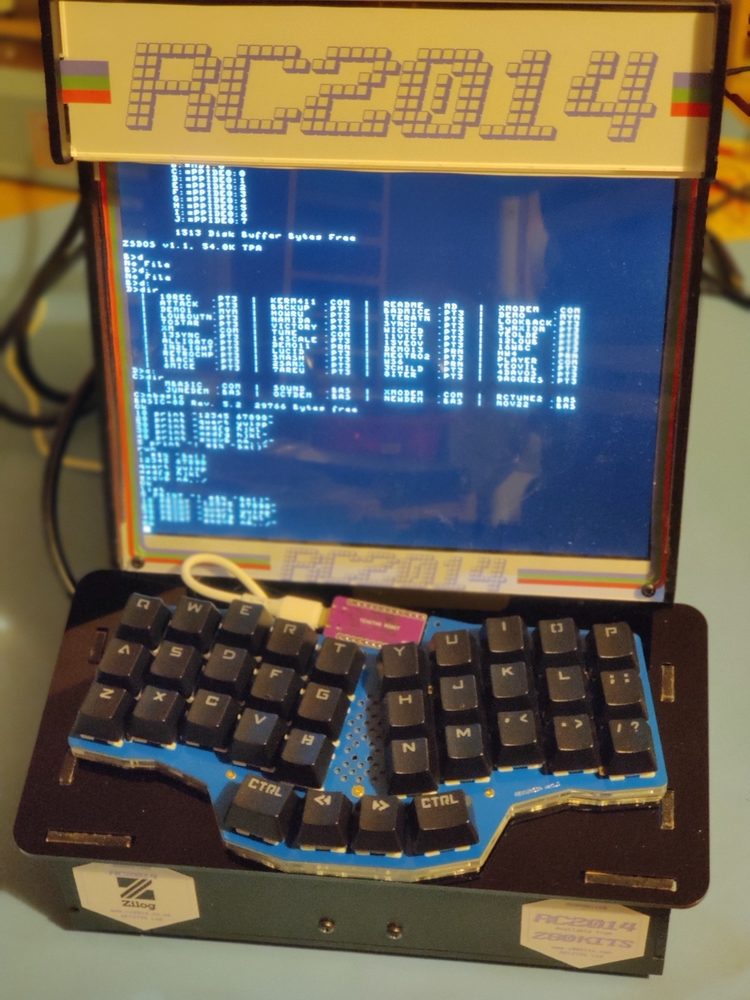
Another was used to upgrade the keyboard from tactile switches on my RCade cabinet with the lower acrylic plate being incorporated in to the chassis. This will undoubtable make me quicker at arcade games like Zork, Hitchhikers Guide To The Galaxy and WordStar!
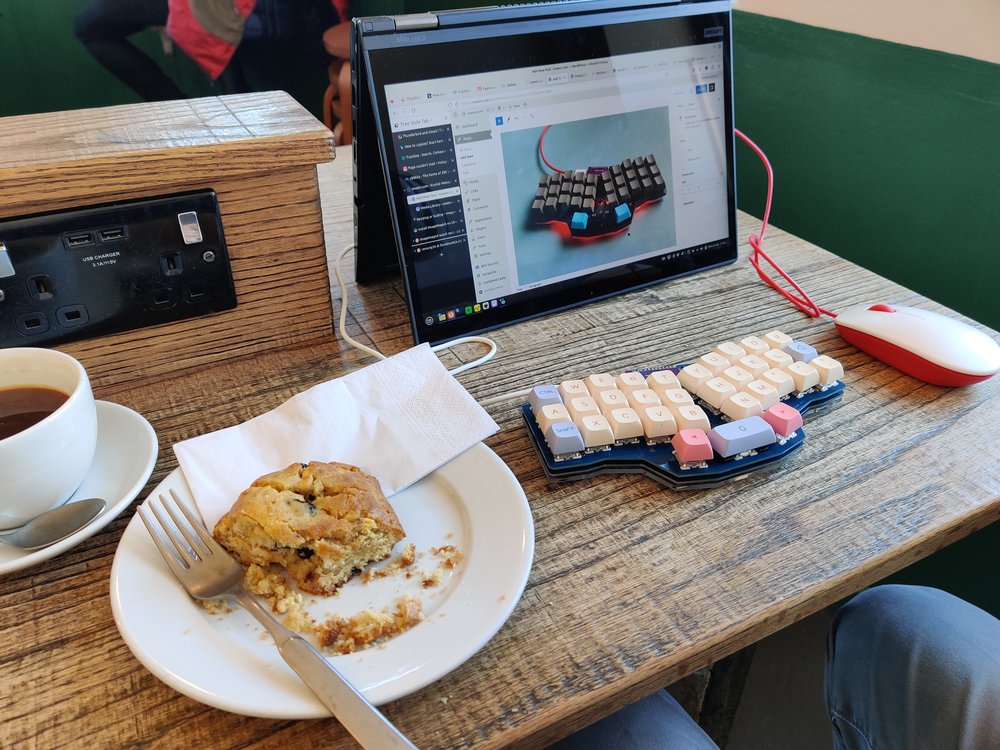
A third one has been fitted with quiet MX Red switches, and only the lower base plate. This gives a lighter keyboard to carry around, and is quiet enough to use out in coffee shops.
Downloads
I have made a cheat-sheet with all of they key combinations on them for whatever character you want to type. I think I have found them all, although it wouldn’t surprise me if there are still some combinations that I haven’t discovered yet. Download the pdf here