One of the most appealing things about the Arduino and ATmega328 is their size and simplicity. After working with desktop and server computers for years I just loved how a small little chip could be programmed easily to achieve things that I cannot get a full blown computer to do. I have never been a computer programmer though, but I know they don't interface with the 'real' world too easily.
If a 28 pin micro controller is good, wouldn't an 8 pin micro be even better? Well, I started to research the ATtiny85 and discovered that it is almost as good as its big brother in some situations. But best of all, it can be programmed from the familiar Arduino IDE
I've been working on a few Arduino projects recently that will hopefully result in varying levels of home automation. The effect so far has been to stick a box here, plug this in there, and dangle a wire from over there, with a general haphazard (with emphasis on the 'hazard' bit in some places!) outcome.
If this is to work with any degree of success, it needs some more permanent infrastructure. It needs power. It needs internet connectivity. It needs to be centralised. It needs easy access to things I want to monitor and/or control. It needs to be tidy and out of the way, but easily accessible. There's a shelf in my cloak room that meets most of those criteria, so this weekend I started getting it prepared;
These days displays are all digital readouts or multifunction LCD screens that give you indications of pretty much everything that's going on. What seems to be lacking though is a good old fashioned analog dial with a needle pointing at a number. Of course, a dial is normally limited to a single use, but I wanted to see if I could make something that's the best of both worlds.
As regular followers of the blog will know, I love Arduinos and all the stuff they can do. Those that know me will also know that I don't love Christmas, particularly the seasonal decoration stuff. So this project was a nice mix of the two!
I decided to make myself some Arduino powered Xmas lights that vary their 'chase' speed based upon how close people are to my house.
Intrigued? Read on...
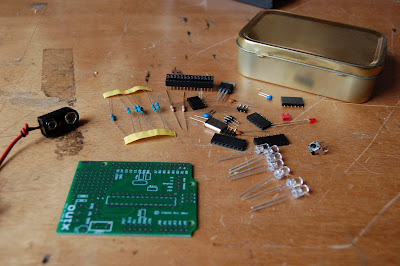
This week I... Built a Xino Basic for Atmel as sold on http://shop.ciseco.co.uk
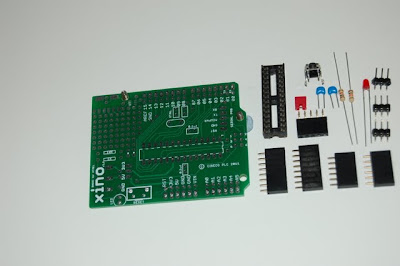
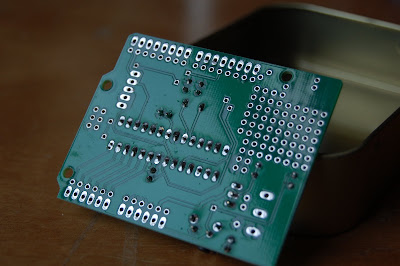
This is sold as a kit that anyone with even the most basic of soldering skills can put together. This is just about the cheapest way to get an Arduino compatible board that fits the standard Arduino shields. It also boasts a nice little prototyping area at the top which will mean that a lot of smaller projects can be completed without the need for additional shields. (See my Xino Dice post for an example of how the prototyping area can be used)The main kit comprises of the PCB, processor socket, connector headers and some resistors, capacitors and an LED
I've been messing about with Arduino derived micro controllers, and have been looking for a way to get them to send simple messages to and from each other. Something simpler than TCP/IP (which requires special hardware and relatively large libraries to run it), but more generic and flexible than just connecting an output pin on one device to the input pin on another.
aProtocol (or LLAP as it's also known) as defined on OpenKontrol seems to fill that gap just nicely. So, in 16 lines of code, I got a simple acknowledgement working;
String msg;
String reply;
void setup() {
  Serial.begin(9600);
  Serial.print("aDDSTARTED--");
}
void loop(){
  if (Serial.available() >= 12){
    if (Serial.read() == 'a') {
      if (Serial.read() == 'D' && Serial.read() == 'D'){
        msg = "";
        for (byte i=0; i<9; i++) msg += Serial.read();
        if (msg.compareTo("HELLO----")) reply = "aDDHELLO----";
        // else if ...
        Serial.print(reply);
 } } } }
A couple of days ago I got a Xino board like this one. Not is this about the cheapest way to get an Ardunio compatible microprocessor, but it has the benefit of a nice little prototype area on board too. So, although it fits standard Arduino shields, many simple projects can be completed on just the one board.
I wanted to do something simple and nice with it, and with components and hardware I had to hand. I realised the prototype area would be great for mounting LEDs, and so the idea of a digital dice was born. I gathered a few bits and bobs and got the soldering iron out.
A decent multimeter is great, but there's times when you just want to have a quick check to see what signals are high, low or neither. A logic probe is ideal for this, but the cheap ones are about £15+, so I decided to build my own. For less than a quid!



 I wanted to do something simple and nice with it, and with components and hardware I had to hand. I realised the prototype area would be great for mounting LEDs, and so the idea of a digital dice was born. I gathered a few bits and bobs and got the soldering iron out.